How to create a totally custom 3D print
without learning CAD or modelling, in minutes
Autodesk’s Meshmixer is a highly underrated tool that has a hugely powerful range of functionality for anyone looking to make changes, improvements or repair their 3D print models.
In this guide we’re showing you how to use the two (of the many) useful features Meshmixer excels at to show you how to sculpt and use it’s automatic-orientation functionality.
Note: While Autodesk has now integrated Meshmixer into their CAD package Fusion 360 software, it will continue to be available in its current format as a stand-alone tool.
Also Note: For brevity, this article assumes you already have Meshmixer and know some basics like loading an STL. Even if you’re not there yet, still read ahead because you’ll quickly see why you need to be using this brilliant free tool, if you’re not already.
Contents
Sculpting in Meshmixer
Sculpting is a kind of manipulation where you manipulate shapes organically, almost as if the model was made of clay and you were pressing the clay around with your hands.
To sculpt in meshmixer, you press the “sculpt” button on the left. Start by choosing a brush depending on what you want to do to the model
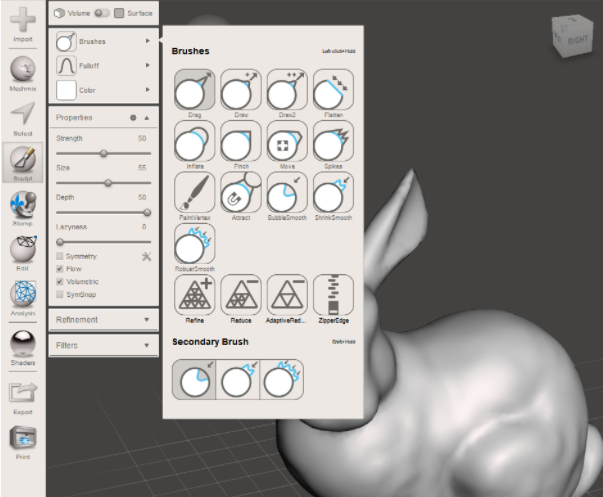
For this example we’re going to start with the bunny rabbit, and for the first activity we will attempt to remove its ears to illustrate a subtractive sculpting action (where we remove features)
From the illustrations of each brush, it is evident that the most suitable one would be the ShrinkSmooth brush, because it takes protrusions and shrinks them smooth.
The sliders on the left let you tweak the action of the brush, but the defaults are fine for most cases. The one you’d most commonly change is the “size” slider, which affects the size of the zone manipulated by the brush.
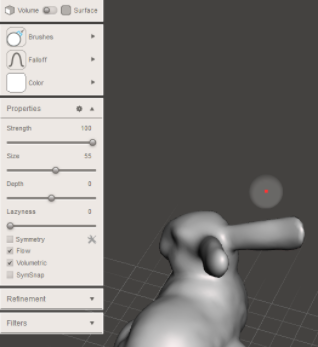
To remove the ears, simply move the brush (the semitransparent circle) onto the ears and hold down the left mouse button. It will progressively shrink and smoothen away the ears, much like the action of sandpaper on a physical print.
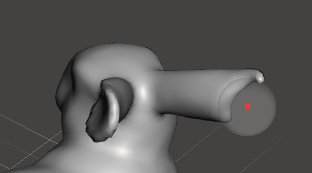
Here’s the end result after some further smoothing with the aptly-named RobustSmooth brush.
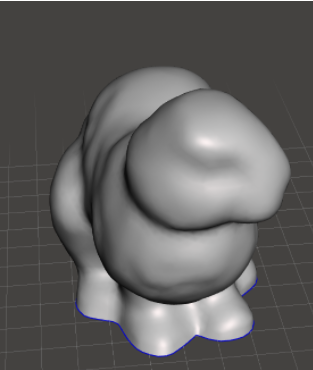
Next, we’re going to demonstrate some additive sculpting action by adding spikes along the spine of the bunny to make it look like a dinosaur. Because, why not - and everyone loves a dino-bunny, don’t they?
For this, we will use the “drag” brush. To use, simply locate the brush where you want to create a spike, left-click and hold, and then drag the model in the direction you want the spike to protrude.
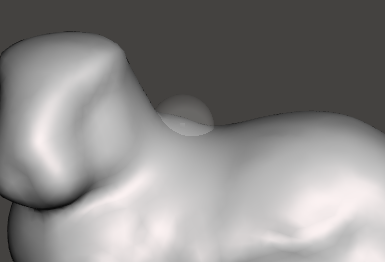
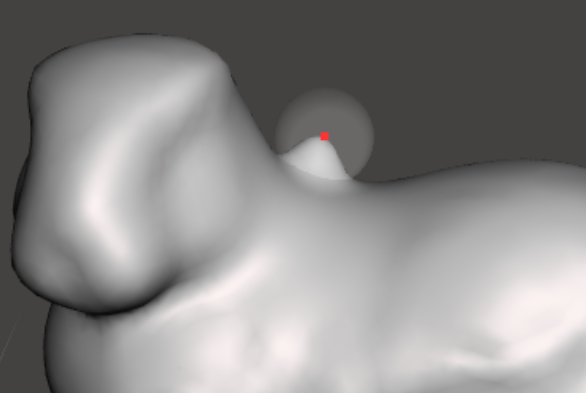
Any time you make a mistake, remember Ctrl+Z will undo the last action and give you another chance.
Here’s the result of clicking and dragging a few times.
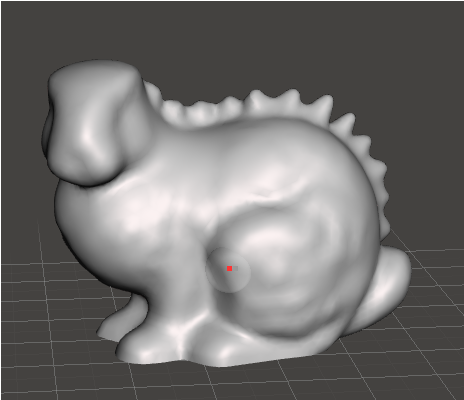
You can use this workflow any time you want to make imprecise cosmetic changes to a model precise dimensionally-accurate manipulation. For that you’ll need to use other techniques (one of which we discuss in our course on this topic).
Sculpting in Meshmixer
Sculpting is a kind of manipulation where you manipulate shapes organically, almost as if the model was made of clay and you were pressing the clay around with your hands.
To sculpt in meshmixer, you press the “sculpt” button on the left. Start by choosing a brush depending on what you want to do to the model

For this example we’re going to start with the bunny rabbit, and for the first activity we will attempt to remove its ears to illustrate a subtractive sculpting action (where we remove features)
From the illustrations of each brush, it is evident that the most suitable one would be the ShrinkSmooth brush, because it takes protrusions and shrinks them smooth.
The sliders on the left let you tweak the action of the brush, but the defaults are fine for most cases. The one you’d most commonly change is the “size” slider, which affects the size of the zone manipulated by the brush.

To remove the ears, simply move the brush (the semitransparent circle) onto the ears and hold down the left mouse button. It will progressively shrink and smoothen away the ears, much like the action of sandpaper on a physical print.

Here’s the end result after some further smoothing with the aptly-named RobustSmooth brush.

Next, we’re going to demonstrate some additive sculpting action by adding spikes along the spine of the bunny to make it look like a dinosaur. Because, why not - and everyone loves a dino-bunny, don’t they?
For this, we will use the “drag” brush. To use, simply locate the brush where you want to create a spike, left-click and hold, and then drag the model in the direction you want the spike to protrude.


Any time you make a mistake, remember Ctrl+Z will undo the last action and give you another chance.
Here’s the result of clicking and dragging a few times.

You can use this workflow any time you want to make imprecise cosmetic changes to a model precise dimensionally-accurate manipulation. For that you’ll need to use other techniques (one of which we discuss in our course on this topic).
Mesh Repair
One of Meshmixer’s most useful functions for 3D printing is repairing a mesh. As you know, slicer software expects a watertight (closed) mesh to slice and print it correctly.
We’ll use the venerable meshmixer bunny to illustrate this. You’ll notice that the bunny is not watertight, because its underside is hollow (the dark pink area in meshmixer indicates the “inside surface” of a model) –
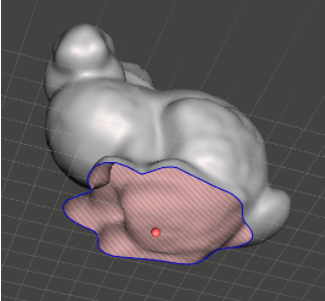
To fix this, go to Analysis -> Inspector
This tool will mark all the defects with coloured spheres. Click a coloured sphere to fix that defect or use “auto repair all” to attempt to fix all of them at once. In this case, meshmixer can fill a hole three ways.
“Minimal Fill” will use the fewest possible number of triangles
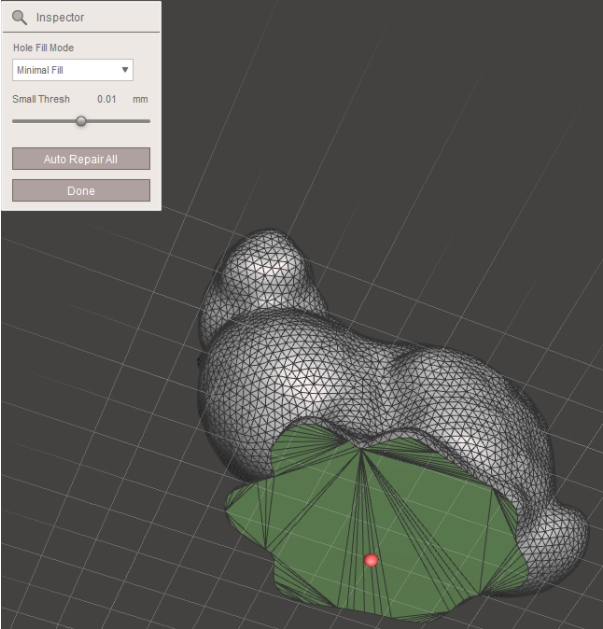
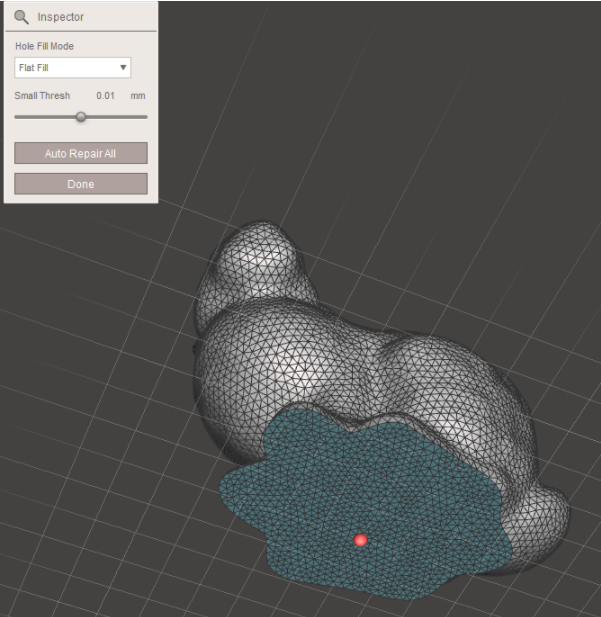
“Flat Fill” will fill the hole flat, using approximately the same triangle density as the rest of the model (useful for when you want a hole to be filled flat, as in this case to give the bunny a flat base for printing)
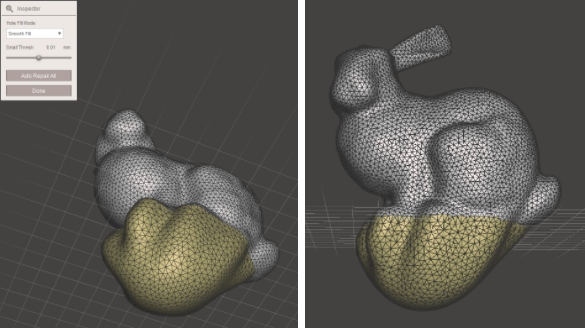
Finally “smooth fill” attempts to fill in the hole in a way that smoothly blends in with the rest of the model (useful for when you’re filling a hole in a curved surface and you want the seam to be smoothly blended in)
Mesh Repair
One of Meshmixer’s most useful functions for 3D printing is repairing a mesh. As you know, slicer software expects a watertight (closed) mesh to slice and print it correctly.
We’ll use the venerable meshmixer bunny to illustrate this. You’ll notice that the bunny is not watertight, because its underside is hollow (the dark pink area in meshmixer indicates the “inside surface” of a model) –

To fix this, go to Analysis -> Inspector
This tool will mark all the defects with coloured spheres. Click a coloured sphere to fix that defect or use “auto repair all” to attempt to fix all of them at once. In this case, meshmixer can fill a hole three ways.
“Minimal Fill” will use the fewest possible number of triangles

“Flat Fill” will fill the hole flat, using approximately the same triangle density as the rest of the model (useful for when you want a hole to be filled flat, as in this case to give the bunny a flat base for printing)

Finally “smooth fill” attempts to fill in the hole in a way that smoothly blends in with the rest of the model (useful for when you’re filling a hole in a curved surface and you want the seam to be smoothly blended in)

Automatic Orientation
This is another extremely useful function of meshmixer, where it will automatically orientate the print in the optimal way based on parameters you select. To access this function, go to Analysis -> Orientation.
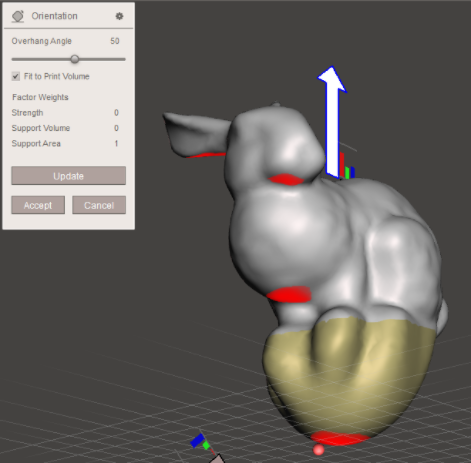
The “overhang angle” slider sets what slope is considered to be an overhang that requires support (as indicated by the red areas on the model). Smaller numbers mean a smaller threshold, so more of the model appears in red and more areas will be assumed to need support. A value of around 45° is good for most 3D printing applications.
The “Factor weights” are where you tell meshmixer what to optimise. Strength is self-explanatory (the higher the number the more it will orient the print so the layer orientation doesn’t compromise strength).
"Support Volume" means to optimise the volume of the supports – so setting a high number here will choose an orientation where the minimum amount of filament is wasted on supports.
Lastly, "Support Area" means to optimise the orientation so as little of the model as possible is in contact with a support (which is very advantageous as every area in contact with supports will either look ugly or will need sanding and finishing to look perfectly smooth).
If for instance you want to prioritise minimizing support volume and support area, with little importance placed to strength, you’d set the weights as follows
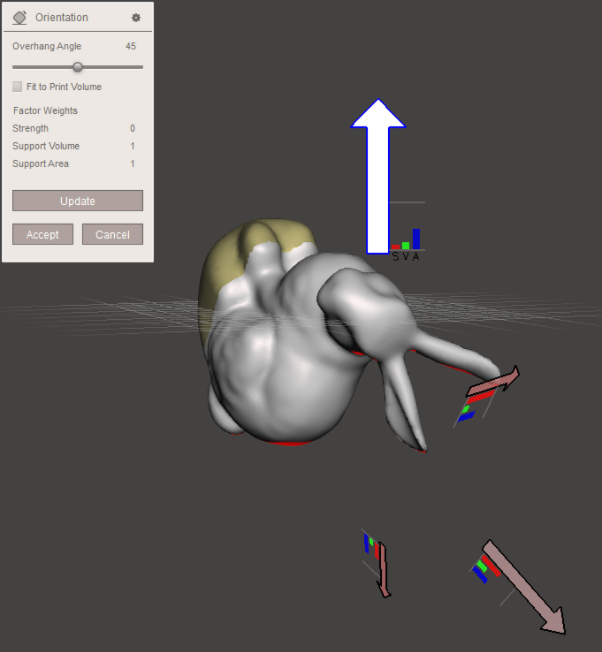
The results are shown with the arrows. Each orientation has a chart showing how good that orientation scores in terms of maximising strength (S), minimising support volume (V) and minimising support area (A).
If you don’t like the orientation meshmixer initially chooses for you, you can click one of the arrows to set a different orientation
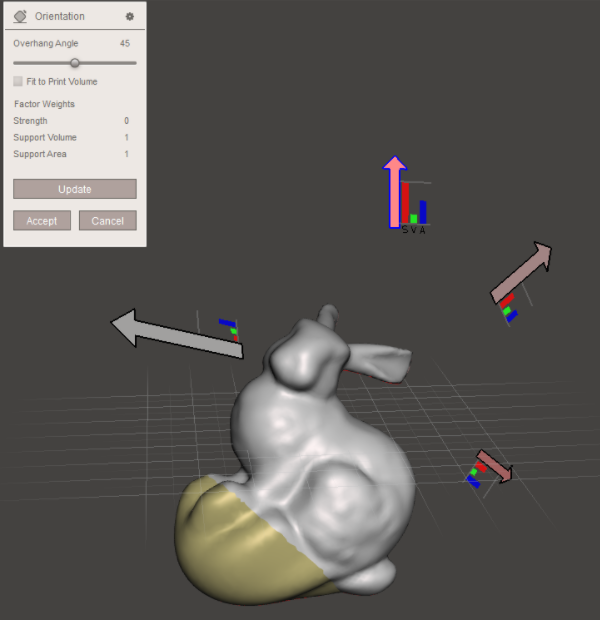
Once you’re done, you can press “Accept” to seal in the re-orientation. Then to save the STL go to File -> Export.
Once exported you can load the STL in your slicer and continue to work on it as normal.
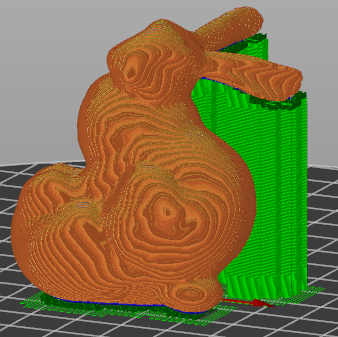
Automatic Orientation
This is another extremely useful function of meshmixer, where it will automatically orientate the print in the optimal way based on parameters you select. To access this function, go to Analysis -> Orientation.

The “overhang angle” slider sets what slope is considered to be an overhang that requires support (as indicated by the red areas on the model). Smaller numbers mean a smaller threshold, so more of the model appears in red and more areas will be assumed to need support. A value of around 45° is good for most 3D printing applications.
The “Factor weights” are where you tell meshmixer what to optimise. Strength is self-explanatory (the higher the number the more it will orient the print so the layer orientation doesn’t compromise strength).
"Support Volume" means to optimise the volume of the supports – so setting a high number here will choose an orientation where the minimum amount of filament is wasted on supports.
Lastly, "Support Area" means to optimise the orientation so as little of the model as possible is in contact with a support (which is very advantageous as every area in contact with supports will either look ugly or will need sanding and finishing to look perfectly smooth).
If for instance you want to prioritise minimizing support volume and support area, with little importance placed to strength, you’d set the weights as follows

The results are shown with the arrows. Each orientation has a chart showing how good that orientation scores in terms of maximising strength (S), minimising support volume (V) and minimising support area (A).
If you don’t like the orientation meshmixer initially chooses for you, you can click one of the arrows to set a different orientation

Once you’re done, you can press “Accept” to seal in the re-orientation. Then to save the STL go to File -> Export.
Once exported you can load the STL in your slicer and continue to work on it as normal.

© The Institute Of 3D Printing trading name of rigid.ink Ltd. 2021. All rights reserved.